In a nutshell
- 🧼 Why tracks get dirty: Dust, condensation, pollen, and pet dander form a sticky paste that abrades rollers and invites mould; a toothbrush and mildly alkaline baking soda lift grime without harming frames.
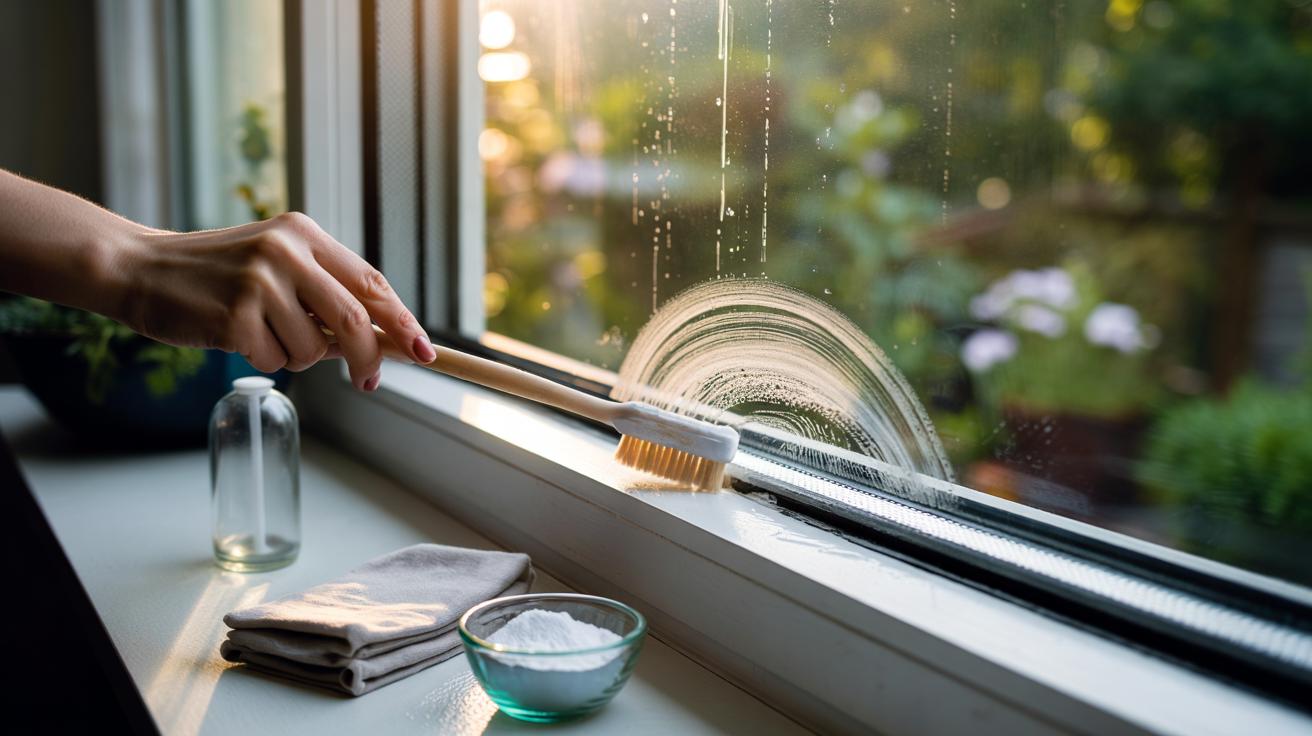
- 🧰 Tools and prep: Vacuum first, then mix 2–3 tsp baking soda with warm water to a paste; keep a spray of white vinegar or hot water, microfibre cloths, and a crevice tool or skewer for corners.
- 🪥 Step-by-step clean: Dry removal → paste placement → light activation → targeted brushing with a toothbrush → wipe and rinse → detail and dry; finish with silicone-safe lubricant if manufacturer-approved.
- 🛡️ Troubleshooting and safety: Treat light mould with diluted vinegar, avoid abrasives on uPVC, rinse quickly on aluminium, minimise moisture on timber, wear gloves, and keep acids off natural stone sills.
- ⏰ Maintenance that sticks: Weekly quick vacuum, seasonal baking soda deep clean; enjoy smoother glide, tighter seals, and quieter windows with a low-cost, low-chemical routine.
Gritty window tracks are the small domestic menace we ignore until a breeze rattles the dirt. The fix needn’t be fussy or expensive. Armed with a humble toothbrush and a scoop of baking soda, you can lift months of sludge in minutes, not hours. This simple routine is kind to your lungs, your wallet, and your uPVC or aluminium frames. No drama. No harsh chemicals. Just a quick prep, a fizzing clean, and a crisp finish. Think of it as a reset for your windows, a tiny upgrade that makes a home feel cared for, brighter, and easier to keep that way.
Why Window Tracks Get So Dirty
Tracks are traps. They sit low, catch condensation, and gather fine grit from roads, gardens, and the sea. Add hair, pet dander, and leftover washing-up spray, and you’ve got a sticky paste that glues itself to the corners. In a British winter, condensation trickles down panes and ferries dust into the channels; in summer, open windows invite pollen. Left unchecked, grime abrades the rollers and invites mould spores into a damp, narrow space. That friction makes windows harder to open, which means you tug harder, stressing fixings and seals. It’s a tiny cycle of neglect that becomes a bigger job later.
The good news: tracks clean beautifully with baking soda, whose mild alkalinity breaks down greasy residues without biting into coatings or rubber. A soft-bristled toothbrush navigates the rails, nub by nub, while the paste lifts grit out of corners the way a detailer cleans a car vent. Done right, the whole process takes less than 20 minutes per window, including wipe-down. Regular light cleans reduce allergens and keep the mechanism smooth, which saves money on maintenance and preserves that just-fitted glide.
Tools, Ratios, and Quick Prep
Set yourself up before the fizz. Open the window fully and vacuum the channel with a crevice tool to remove loose grit; this stops you smearing muck into a slurry. Mix a small batch of paste: two heaped teaspoons of baking soda with just enough warm water to form a spreadable, grainy cream. Keep a spray bottle of white vinegar or hot water to activate the lift. Lay a microfibre cloth along the sill to catch drips, and have a blunt wooden skewer or old plastic loyalty card ready to nudge debris from tight edges. Protect painted timber with minimal moisture and immediate drying.
| Item | Purpose | Typical Amount |
|---|---|---|
| Baking soda | Loosens grime and deodorises | 2–3 tsp per window |
| Toothbrush (soft) | Detail scrubbing in rails | 1 |
| White vinegar or hot water | Activates lift, reduces residue | 100–150 ml |
| Microfibre cloths | Wipe and dry | 2–3 |
| Crevice vacuum tool | Pre-clean grit removal | Optional |
Work in daylight if possible. You’ll spot the sneaky build-up along screw heads and weep holes, and you won’t over-wet sensitive frames. Keep liquids away from electrics and always wring cloths well before touching switches or cords.
Step-by-Step Cleaning With Toothbrush and Baking Soda
Step 1: Dry removal. Vacuum the track and pluck out larger bits with your fingers or a skewer. A cleaner starting line makes paste more effective. Step 2: Paste placement. Dab baking soda paste into the rails, corners, and around screw heads. Thin, not thick; you’re coating, not icing a cake. Step 3: Activate. Lightly mist with white vinegar or hot water. You’ll see a gentle fizz as the paste loosens grime. Wait one to two minutes. Patience here saves scrubbing effort later.
Step 4: Brush smart. Use the toothbrush in short, choppy strokes with the grain of the track. Chase debris towards the drainage end, not back under the sash. For stubborn spots, reapply a pea-sized blob of paste and scrub in tight circles. Step 5: Lift and wipe. Fold a microfibre into a firm pad and swipe from clean to dirty, flipping to a fresh side as you go. Rinse and wring the cloth; repeat until the cloth comes away clean. Step 6: Detail and dry. Nudge remaining grit from corners with a skewer, wipe again, then dry thoroughly to deter mould. Finish with a tiny spritz of silicone-safe lubricant on the rollers if recommended by your window manufacturer.
Troubleshooting, Safety, and Smart Maintenance
If you spot black specks or a musty whiff, you may have light mould. After cleaning, dab the area with diluted vinegar (1:1 with water), leave five minutes, then dry completely. On uPVC, stay gentle; avoid abrasive scouring pads that leave a dull bloom. For aluminium, use minimal vinegar and rinse quickly to preserve the anodised finish. Painted timber? Keep water scarce and follow with a dry cloth and open air for 15 minutes. Never flood wooden sills—excess moisture warps profiles and lifts paint.
Sticky tan stains can be old insect residue. Reapply paste, add a drop of washing-up liquid, and give it time. If sand keeps returning, check exterior weep covers and brush seals; a quick hoover along the frame edges works wonders. Safety-wise, wear light gloves if you have sensitive skin, and keep vinegar away from natural stone sills to prevent etching. Dispose of dirty rinse water down a utility sink, not onto garden beds. Build a habit: a two-minute vacuum of tracks during weekly dusting, then a baking soda deep clean every change of season. Little and often beats the dreaded once-a-year slog.
Clean tracks change how a window feels. They glide, they seal, they stay quieter on windy nights. And you achieved it with a toothbrush, a sprinkle of baking soda, and a measured spritz. No mystery. Just a tidy method applied with care. If today you tackle the worst window and set a seasonal reminder, next time will be a breeze—literally and figuratively. What twist will you add to make this routine your own: a specific brush, a scent in your spray bottle, or a schedule that fits your home’s rhythm?
Did you like it?4.6/5 (27)