In a nutshell
- 🌱 Harness capillary action with a wick-and-reservoir to deliver self-regulating moisture that protects roots and reduces pests.
- 🧴 Reuse clean bottles (500 ml–5 L) and capillary-friendly wicks (cotton, acrylic, nylon); pair with airy soil and match reservoir size to pot using the quick guide.
- 🛠️ Build it: pierce the cap, thread and prime the wick, set up inverted or in-pot, fill with water (weak feed optional), then test and tweak over 24 hours.
- 🎛️ Tune performance: adjust wick thickness/length and bottle height; shade to curb algae, add mesh for mozzies, and diagnose overwatering vs underwatering by soil feel and leaf cues.
- 🛡️ Stay safe and sustainable: avoid chemical bottles, flush monthly, reduce winter feed, keep glass secure—enjoy water-saving, deeper rooting, and steadier growth.
Old bottles don’t have to languish in the recycling bin. With a few careful cuts and a little science, they become neat, low-cost lifelines for thirsty houseplants and balcony pots. A simple self-watering setup keeps moisture steady when you’re busy, on a weekend away, or facing a hosepipe ban. It’s gentle on roots, kinder on bills, and remarkably reliable. This guide explains the method behind the magic, then walks you through making and tuning your own system. Expect fewer wilted stems, more resilient growth, and a cleaner conscience. Ready to turn waste into water wisdom?
Why Bottle Wicking Works
The secret is capillary action. A fibre wick draws water from a reservoir and releases it into soil as the plant uses moisture. No electronics. No timers. Just physics. Because water moves only when the soil becomes drier than the wick, the flow is self-regulating. It’s gentle, too, which protects fine roots from shock and helps keep nutrients in the root zone.
Imagine a thin cord bridging two worlds: cool water below, warm soil above. As evaporation and plant uptake create a tiny deficit near the roots, the wick compensates, drop by drop. This keeps moisture in the “goldilocks zone” longer, so pots swing less wildly between soaked and parched. In UK homes where heating dries air in winter and windows radiate heat in summer, that steadiness matters.
There’s more. A bottle-based system encourages deeper rooting and reduces runoff. By slowing delivery, it also limits common scourges such as fungus gnats that thrive in soggy, overwatered media. Less waste, fewer pests, stronger plants. Simple, frugal, effective.
Preparing Bottles, Wicks, and Soil
Start with what you’ve got. A 500 ml soft drink bottle suits small herbs; a 1–2 litre bottle matches medium houseplants; hefty tubs prefer 5 litre containers or multiple small ones. Choose food-safe plastic or glass. Wash thoroughly. Remove labels and sticky residue to deter mould. Never use bottles that held chemicals, oils, or sugary drinks without meticulous cleaning. A clean reservoir means cleaner roots.
Your wick is crucial. Cotton string, acrylic yarn, or braided nylon shoelaces all work; microfibre clothes ripped into strips are surprisingly good. Prioritise capillary-friendly fibres with enough thickness to move water but not so much that they flood the pot. Pre-soak wicks in clean water to prime them. Prepare the soil, too: a light, airy mix with added perlite or coco coir helps even distribution. Heavy, compacted compost resists lateral flow.
Match bottle to plant using the quick guide below. It’s not perfect science, but it’s practical and close enough for most windowsills and patios.
| Plant/Pot Size | Bottle Size | Estimated Days Between Refills | Notes |
|---|---|---|---|
| Small herb (10–12 cm pot) | 500 ml | 3–5 days | Use a thin cotton wick |
| Medium houseplant (15–18 cm) | 1–2 litres | 5–8 days | Prime wick thoroughly |
| Large indoor pot (20–25 cm) | 2–5 litres | 7–12 days | Two wicks prevent dry spots |
| Outdoor planter (window box) | 2 litres per 30 cm | 2–6 days | Shade the reservoir |
Step-By-Step: Building a Simple Bottle Wick System
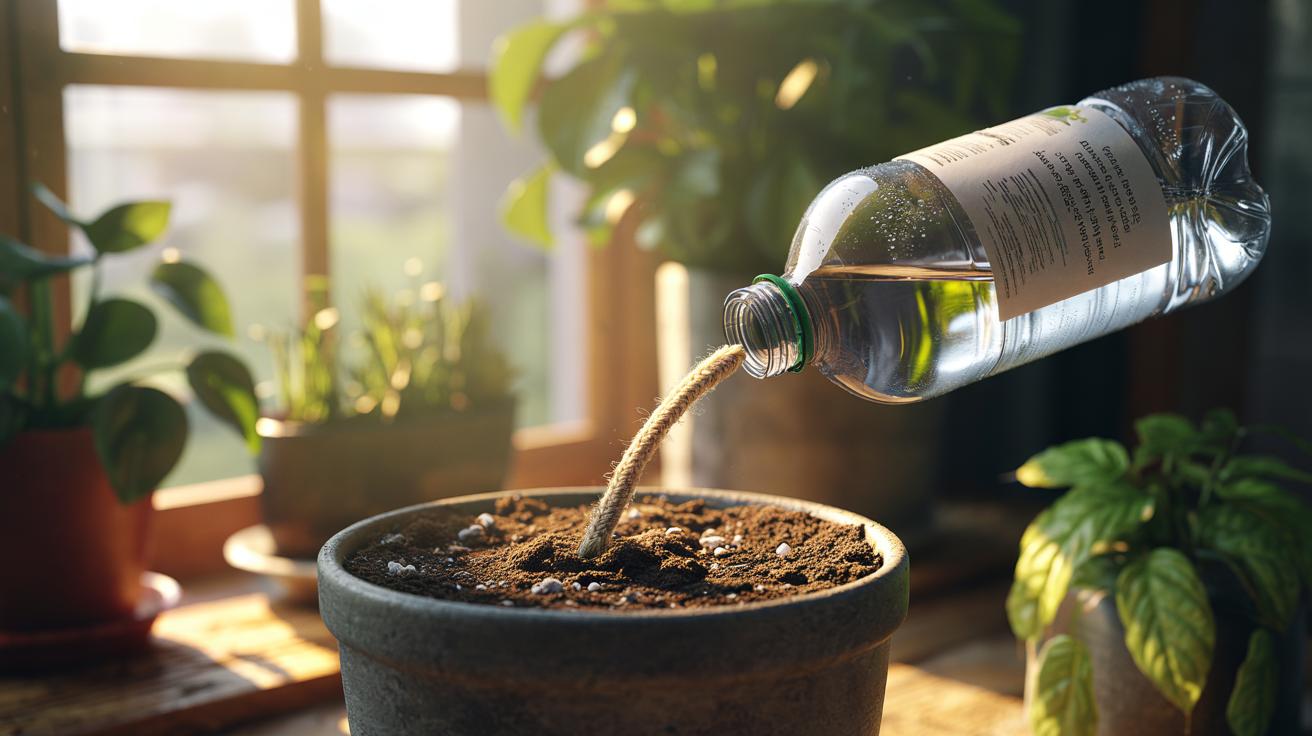
Step 1: Prepare the bottle. Rinse it well. Pierce the cap with a snug hole using a hot nail or awl; the wick should fit tightly. Thread the dampened wick through until 5–8 cm protrudes outside the cap. Tight fit equals steady flow; loose fit equals leaks. For the classic inverted design, cut the bottle in half and invert the top into the bottom to make a tidy reservoir.
Step 2: Prime and place. Fill the reservoir with water. Add a pinch of liquid feed if needed, but go weak—half strength or less. Screw on the cap with wick inserted. For an in-pot system, bury the inner end 5–7 cm deep near the root zone, not directly against the stem. For the inverted half-bottle planter, pack your soil around the wick in the upper chamber, then sit it over the lower half.
Step 3: Test and tweak. Wait an hour. Check the soil with your finger, then again after 12–24 hours. You’re looking for consistent, faint dampness, not wetness. If it’s too dry, use a thicker wick or add a second strand. Too wet? Trim the wick shorter in the soil or reduce bottle head height. Always run a 24-hour test before leaving for holiday. Small changes make big differences.
Tuning, Troubleshooting, and Safety
If algae bloom in clear bottles, wrap them in brown paper or foil. Shade reduces growth and slows evaporation. Mosquito worries outdoors? Cover the cap hole with a fine mesh before inserting the wick, or keep the bottle nearly sealed. Keep the cap loosely fitted to reduce evaporation while still allowing air exchange. Indoors, tuck the reservoir behind a pot or inside a decorative cover to neaten the look.
Overwatering signals—mushy leaves, sour smell—mean the wick is too efficient. Switch to a thinner fibre, shorten the soil segment, or lower the reservoir relative to the pot so gravity resists flow. Underwatering? Reverse the logic. Raise the bottle slightly, or use a broader capillary material like cotton mop string. Check that the wick is fully wet; a dry wick won’t start siphoning properly.
Safety matters. Place glass out of reach of children and pets. Avoid fertiliser build-up by flushing pots monthly with plain water. In winter, reduce feed in the reservoir—plants drink less. Do not rely on sugary drink residue for nutrients; it invites mould and pests. With a little attention, the system purrs along for months, saving water while protecting roots.
With a few old bottles, a length of wick, and a pinch of curiosity, you can deliver slow, smart hydration to almost any pot. The method respects plant rhythms, cuts waste, and frees your schedule. It’s frugal. It’s resilient. It’s oddly satisfying to build. As you refine bottle size, wick thickness, and placement, you’ll learn your plants’ preferences and your home’s quirks. What will you try first—a windowsill herb rail, a thirsty monstera, or a week-long holiday test to prove your new self-watering setup works when you’re away?
Did you like it?4.6/5 (22)